Hang one load of wet laundry in a spare room in January and you’re adding roughly two liters of water to the air in that room. Where that water goes decides whether indoor drying is a cheap, gentle habit or the reason the bedroom window is streaming every morning. This guide starts from that number: how much moisture a load gives off, where a rack can safely go, how many feet of rail a real load needs, and what you actually save compared with the dryer. Then it gets practical about loading the rack so things dry in a day instead of three.
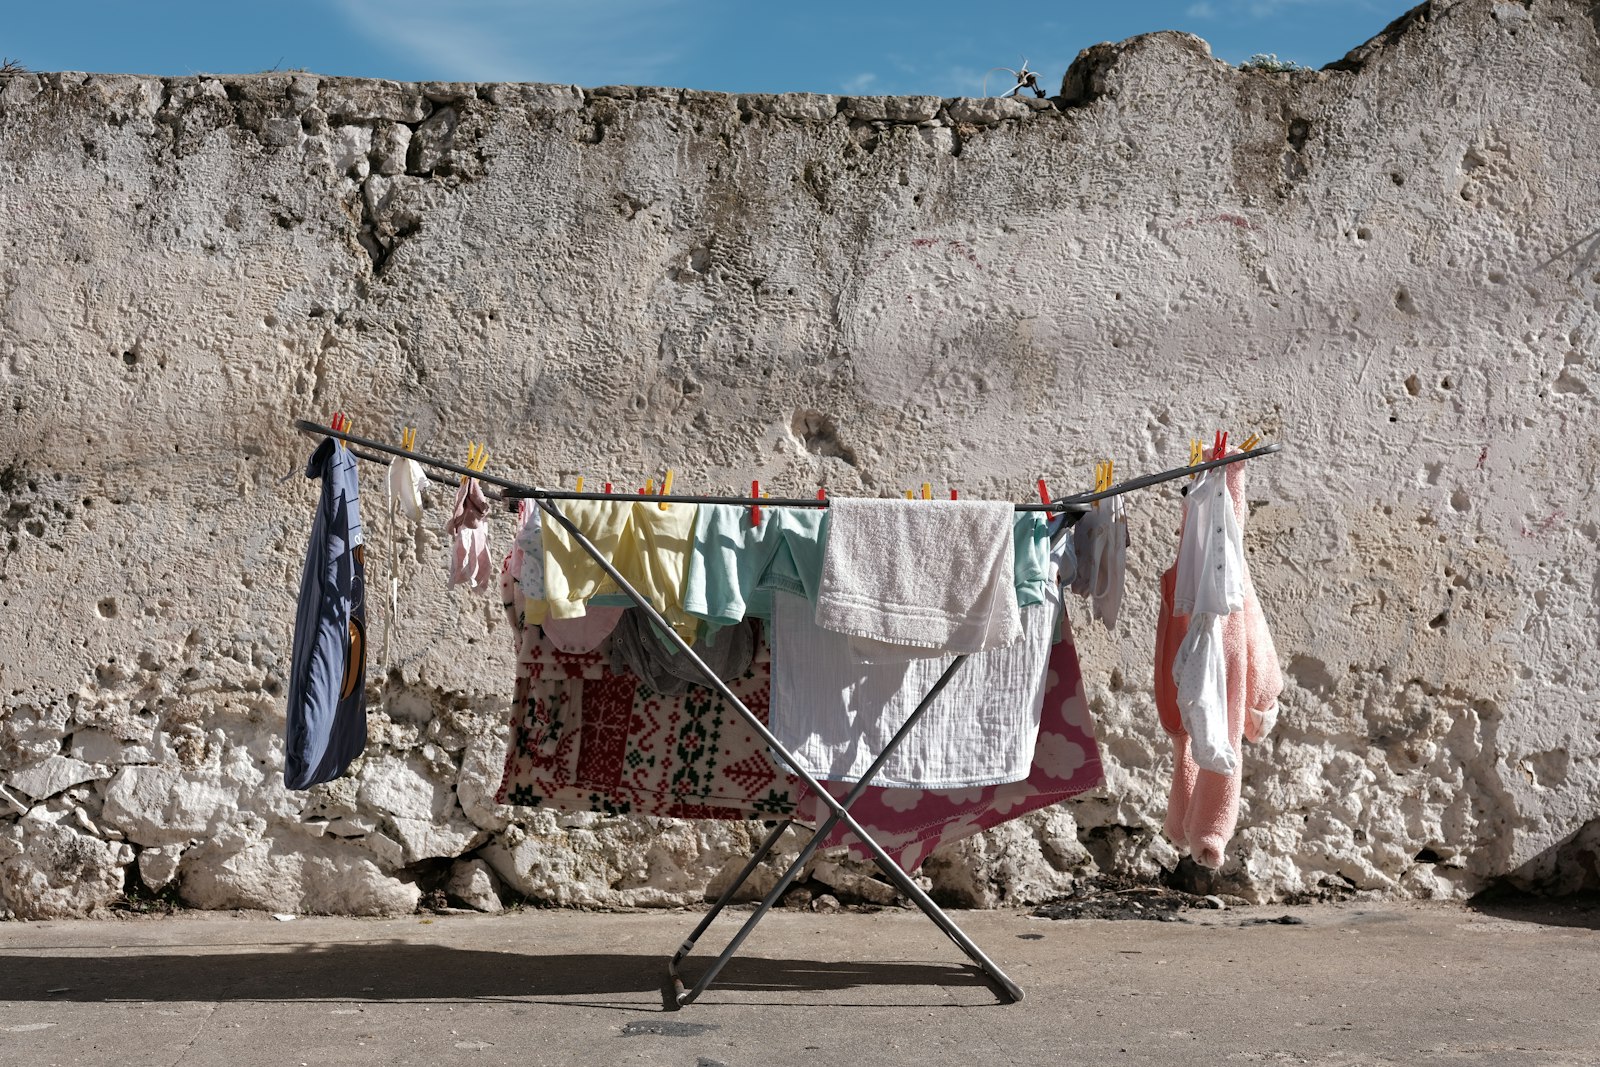
A washed load still holds more than half its dry weight in water, and air-drying releases all of it into your home. Put the rack where that moisture can leave: a bathroom with the exhaust fan running, a laundry room, or near a cracked window, not a closed bedroom. Keep it at least 3 feet from any space heater. Size the rack by counting inches of rail, not by the photo; a typical family load needs well over 20 feet. Space items apart, hang heavy things on the outer rails and turn them halfway. Watch indoor humidity and window condensation, and if a load is still damp after a day, add airflow. The money saved is real but modest, so dry indoors for fabric care and the few-items loads, not because it pays the mortgage.
Start with the water
The federal test that rates clothes dryers gives a useful benchmark. Under the Department of Energy’s procedure, a standard-size dryer is tested with an 8.45-pound load (weighed bone dry) that’s been dampened and spun until it holds 57.5 percent of its dry weight in water, which is meant to stand in for what comes out of a washer. That’s a lab number, and your machine’s spin speed and fabrics will change it, but it’s a fair starting point.
| Step | Math | Result |
|---|---|---|
| Water held by the load | 8.45 lb × 0.575 | about 4.86 lb |
| In gallons | 4.86 lb ÷ 8.34 lb per gallon | about 0.58 gallon (roughly 9 cups) |
| In liters | 4.86 lb × 0.4536 kg per lb | about 2.2 liters |
| Three loads a week | 0.58 gallon × 3 | about 1.75 gallons a week into the air |
A vented dryer pushes that water outdoors through the duct. A rack in the living room doesn’t, so the moisture spreads into the room until it’s carried off by ventilation, soaked up by the air or condenses on the coldest surface it finds, usually a window. That’s the whole case for choosing the spot carefully.
Pick a spot the moisture can leave
The EPA’s guidance on mold and moisture says to keep indoor relative humidity below 60 percent, ideally between 30 and 50 percent, and to act quickly when condensation shows up on windows, walls or pipes, because it can be a sign the air is too humid. It also recommends running the bathroom fan or opening a window, and using fans or open doors to increase air movement. Those three ideas, humidity, ventilation and airflow, decide where a rack belongs.
1. The bathroom, with the exhaust fan running
A bathroom is built to get rid of moisture: it has a fan ducted outside and a hard floor that doesn’t mind drips. Set the rack up after the last shower, run the fan for a while, and leave the door open a crack so air can come in to replace what the fan pulls out. A tub with a tension rod or a shower rod with a few hangers works for shirts if the floor is tight.
Try it if your bathroom fan actually vents outside (hold a square of toilet paper to the grille; it should stick). Skip it if it’s the only bathroom for a busy household in the morning, or the fan is weak and the mirror stays fogged long after showers.
2. The laundry room or a utility area
If the washer has its own room, a wall-mounted fold-down rack above or beside it keeps wet clothes a few steps from the machine and off the living areas. Our laundry room shelving guide has the clearance checks for lids, the dryer vent and the water shutoffs, which apply just as much to a drying rack on that wall.
3. A living space with a fan or a cracked window
An open, warmer room dries faster than a cool, closed one. A small fan pointed across the rack (not at it from inches away) speeds things up a lot. In cold weather, a window cracked an inch for an hour or two gives the moisture an exit without chilling the room for long.
4. Places to avoid
- A closed bedroom overnight. Little airflow and a cold window glass is the textbook condensation setup.
- Inside a closet or a cupboard. Damp clothes in a closed space stay damp.
- On or in front of a space heater. The U.S. Fire Administration says to keep anything that can burn, clothing included, at least 3 feet from a space heater. A rack beside a heater is exactly the setup that rule is about. Radiators and baseboard heaters are a different case, but don’t drape clothes over any heater’s grille.
- In a doorway or hallway. A rack in the walking path gets bumped, tipped or snagged, and it’s in the way if you need to get out quickly.
Size the rack in inches of rail
Rack listings love a photo of four shirts. What matters is total hanging length, which some manufacturers list as feet of drying space and others leave you to work out from the number and length of rails. Count what a typical load needs before you buy, using the width each item takes when it’s draped over a rail. The widths below are typical; drape a few of your own things over a broom handle and measure, since a kid’s shirt and a men’s XL are very different.
| Item | How many | Rail width each | Total |
|---|---|---|---|
| Adult T-shirts, draped over a rail | 6 | 20 in | 120 in |
| Jeans, folded over at the knee | 3 | 16 in | 48 in |
| Bath towels, folded over once | 2 | 27 in | 54 in |
| Socks and underwear | 12 | 5 in | 60 in |
| Total | 120 + 48 + 54 + 60 | 282 in, about 23.5 ft | |
So this load wants roughly 24 feet of rail, plus a little gap between items so air can move. If the rack you’re eyeing lists less than that, plan on hanging shirts on hangers from a door frame or shower rod, or accept that towels go in the dryer. That’s not a failure; it’s the honest math.
Choose the rack style for the space
5. Folding floor rack
The classic: opens flat or into an A-frame, folds to a few inches thick for storage behind a door. Good for most homes. Check the open footprint against the room as well as the rail length, and look for rails that don’t sag under wet jeans.
6. Wall-mounted fold-down rack
Folds flat against the wall when it’s empty, which makes it the best choice for a laundry room or a small bathroom. It needs a secure mount, ideally into studs, because a loaded rack is heavier than it looks once you remember it’s holding several pounds of water.
7. Over-the-door or over-the-tub rack
No floor space, no drilling. Good for a handful of delicates and the gym clothes that shouldn’t see the dryer. Check that the door still closes and that the rack doesn’t scratch the finish.
8. A mesh flat-drying screen for knits
Sweaters that the care label says to dry flat need to lie flat, not hang. A mesh screen that sits over the tub or stacks on a rack lets air reach both sides. A towel on a bed works in a pinch, though it’s slower.
Try it if you own wool or hand-knit sweaters. Skip it if everything in your closet is cotton and polyester; a regular rack covers you.
9. Ceiling-hung pulley airer
A rack that lifts toward the ceiling uses the warmest air in the room and keeps laundry out of the way. It’s a bigger install and needs solid ceiling framing, so it’s a project for homeowners rather than renters. Our small apartment storage ideas cover renter-friendly ways to use vertical space instead.
Load it so it dries in a day
- Run the fastest spin your fabrics can take. Every bit of water the washer spins out is water that doesn’t end up in your air.
- Shake each item before hanging. Fewer wrinkles, and fabric layers that aren’t stuck together dry faster.
- Leave a finger’s width between items. Touching items dry like one thick item.
- Heavy and slow things on the outside. Jeans and towels on the outer rails where the air is moving; light shirts and socks in the middle.
- Turn thick items halfway through. Flip jeans and towels so the inner fold gets its turn on the outside.
- Shirts on hangers. They dry faster and need less ironing, and they free up rail for the things that can’t hang.
The EPA notes that damp materials dried within 24 to 48 hours usually won’t grow mold. That’s guidance for leaks and spills, but it’s a handy benchmark for laundry too: if a load still feels damp after a day, it needs more airflow, a warmer room or fewer items on the rack. A musty smell on air-dried towels is the same signal.
What it saves, honestly
Federal efficiency standards give a way to estimate dryer energy without guessing. A standard-size vented electric dryer made since 2015 has to dry at least 3.73 pounds of clothes per kilowatt-hour under the test procedure. Older dryers may use more, and ENERGY STAR says certified heat pump dryers use around 70 percent less energy than conventional models, so treat this as a ballpark for a basic new electric dryer.
| Step | Math | Result |
|---|---|---|
| Energy per load | 8.45 lb ÷ 3.73 lb per kWh | about 2.27 kWh |
| Cost per load at an example rate | 2.27 kWh × $0.18 | about $0.41 |
| Loads air-dried | 3 a week × 12 weeks | 36 loads |
| Energy saved | 36 × 2.27 kWh | about 81.7 kWh |
| Money saved | 81.7 kWh × $0.18 | about $14.70 |
The $0.18 is only an example; plug in what you really pay. Our guide to reading your electric bill shows how to find your all-in rate per kilowatt-hour. If you have a heat pump dryer, the saving per load is far smaller, closer to 12 cents at that rate. If you have an older dryer or high electric rates, it’s bigger.
Two takeaways from the math. First, air-drying is worth doing, but it’s a modest saving, not a transformation; our article on why winter electric bills jump covers the bigger levers. Second, the best use of a rack may be the small loads. ENERGY STAR points out that drying a single towel for 30 minutes costs about as much as drying a full load for the same time, so the three delicates and the one wet sweatshirt belong on the rack, not in a half-empty drum.
Keep the dryer healthy for the loads it does do
Indoor drying doesn’t replace the dryer for most families, so look after it. ENERGY STAR recommends cleaning the lint filter after every load, both for efficiency and safety, and scrubbing it now and then if you use dryer sheets, since they can leave a film. If loads are taking two cycles even when the dryer isn’t overloaded, check the vent; our dryer vent warning signs walk through what to look for.
And when a holiday tablecloth or a stained shirt comes out of the wash, air-dry it until you’re sure the stain is gone; heat can set what’s left. Our holiday stain removal guide covers what to try first.
Affiliate disclosure: As an Amazon Associate I earn from qualifying purchases. The links below are Amazon searches, not specific products we’ve tested or recommend over others.
- Folding floor drying racks (Amazon search) ↗
- Wall-mounted fold-down racks (Amazon search) ↗
- Mesh flat-drying screens for sweaters (Amazon search) ↗
- Indoor humidity meters (Amazon search) ↗
- Over-the-door drying racks (Amazon search) ↗
Compare the listed total drying length with the rail your loads need, and check the open footprint against your floor space.
- Rack in a bathroom with the fan running, a laundry room or a room with airflow, not a closed bedroom.
- At least 3 feet from any space heater; nothing draped over a heater.
- Out of hallways and doorways.
- Rail length checked against a real load (count the inches).
- Fastest safe spin on the washer; items shaken out and spaced apart.
- Heavy items on the outer rails, turned halfway through.
- Humidity meter reading kept under 60 percent, ideally 30 to 50.
- Window condensation wiped up and the room ventilated when it appears.
- Still damp after a day? More airflow or fewer items.
Is it bad to dry clothes indoors in winter?
Not if the moisture has somewhere to go. The EPA’s guidance is to keep humidity below 60 percent and act quickly on condensation, so dry where there’s an exhaust fan or airflow, check a humidity meter and watch the windows. If they stream every morning, move the rack or ventilate more.
Can I put a drying rack next to a space heater to speed it up?
Keep it at least 3 feet away. The U.S. Fire Administration advises that distance for anything that can burn, including clothing. A fan blowing across the rack is a safer way to speed things up.
Does a dehumidifier help?
It can, in a closed room or a basement where there’s no other way to get moisture out; the EPA lists dehumidifiers among the ways to lower indoor humidity. It uses electricity too, so it eats into the savings, but it’s often worth it to protect walls and windows.
Sources: U.S. EPA, A Brief Guide to Mold, Moisture and Your Home · ENERGY STAR, Clothes Dryers · U.S. Department of Energy dryer rules: 10 CFR 430 Appendix D2 (test procedure) and 10 CFR 430.32 (efficiency standards) · U.S. Fire Administration, Heating Fire Safety. Follow each garment’s care label and your rack’s weight limits.
Keep reading
More guides for your space
THE KINDRED JOURNAL
Latest from the journal
- Window Condensation in Winter: Find Which Side the Water Is On, Then Match Humidity to the Forecast
 Do the wipe test to tell room-side fog from a failed seal, check a hygrometer against the outdoor low, keep humidity at or under 40% above 20°F and 30% below 10°F, run the fans, open the curtains by day and dry wet sills the same morning: a window condensation guide with a worked cold-week example.
- How to Clean a Range Hood Filter Before Holiday Cooking: Know Your Filter Type, Then Put It on the Calendar
 Wash metal mesh and baffle filters in hot soapy water or the dishwasher, replace charcoal filters instead of rinsing them, never run the hood with the filter out, and clean the weekend before Thanksgiving and again before Christmas: a range hood filter guide with a worked holiday cleaning calendar.
- Drying Clothes Indoors in Winter: Where the Rack Goes, How Much Rail You Need and What It Saves
 One load gives off about 2 liters of water as it air-dries, so put the rack where that moisture can leave, keep it 3 feet from the space heater, count inches of rail before you buy, space and turn the heavy things, watch humidity and window condensation, and know what the dryer you’re skipping really costs: indoor drying with the math.
- Hat, Glove and Scarf Storage by the Door: One Bin Per Person, Sized to What They Actually Wear
 Keep a daily set plus one dry spare per person, size an open bin for each from a quick measurement, dry wet mittens before they go in, clip pairs together, hang woven scarves and fold knits, skip long scarves on the playground and wash wool before it’s sealed away: a hat and glove station with a worked bin-size example.
- Guest Room That Doubles as Storage: Pick the Bed by Floor Space, Keep the Window Clear
 Count the nights the room really hosts, compare bed footprints before comfort, put storage on one wall behind a curtain, keep the window and door clear, leave guests half the closet and one drawer, and pack a single guest bin: a storage room that turns into a guest room in fifteen minutes, with a worked 10 by 11 foot example.
- Dining Room Storage for Holiday Hosting: Measure the Walkway First, Then Fit the Sideboard
 Measure the table with the leaf in, leave 44 inches where people walk and 32 where nobody passes, subtract the sideboard’s depth before you buy, anchor the hutch and give the leaf, extra chairs and holiday linens a home: dining room storage planned for the biggest night of the year, with a worked placement example.
- Winter Car Emergency Kit: 12 Things to Pack and Where Each One Should Ride
 Start from the National Weather Service list, put the heavy gear in one strapped-down trunk bin, keep the blanket, light and charger in the cabin and the scraper in the door, and know the stranded-car basics: twelve ideas for a winter car kit that stays packed until February.
- Smoke and CO Alarms: A One-Hour Audit of Where They Go, How Old They Are and What to Replace
 Put a smoke alarm in every bedroom, outside each sleeping area and on every level, add CO alarms outside sleeping areas, keep them 10 feet from the stove, read the date on the back and replace anything 10 years old: a one-hour alarm audit, with a worked two-story example.
- Winter Home Maintenance Checklist: Do the Safety Jobs First, Then the Water, Then the Savings
 Book the furnace and chimney check, clear 3 feet around every heat source, mark the outdoor vents before snow buries them, work out how many gallons each downspout carries and extend the heavy ones: a winter maintenance checklist sorted by what happens if you skip it.